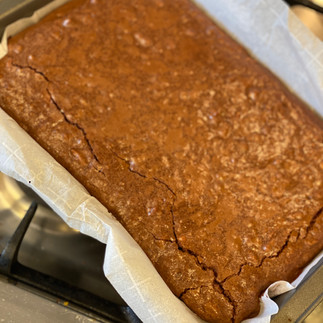
Sometimes you need a recipe in your back pocket that is so good that people think you must have bought it from the store, but is also so easy to make that you're secretly laughing. This is that recipe! Deliciously gooey fudgy brownies, with crunchy nuts and that perfect crackle top.
I made these in a spare hour I had before I had to collect the kids for school, and let me tell you the whole house was filled with the most delicious smell of melted chocolate for hours. Best of all, my kids are weirdos who hate chocolate so they are all for me and my husband!
You can eat these as they are, but they are also delightful warmed up and served with a big scoop of vanilla ice cream.

Baking Tips
These brownies are very versatile. You can really adjust them to suit ingredients you have on hand, and scale up or down as needed. In this recipe I used pecans and walnuts, but you can really get creative with the combination in this recipe. I've also thrown in some sliced almonds before, macadamias, and adjusted the proportions based on whatever nuts I had in the store cupboard I needed to use up. While I fully grant you creative license here, I will say that to me the pecans are essential. They provide a smooth caramel flavor that is unbeatable in my opinion.
You'll notice in this recipe I decided to use whole shelled nuts and then chop them myself. This is a matter of personal preference. I like to do this so that I can control the size of the pieces, and also because I think they taste fresher than the pre-chopped ones. But if you have chopped nuts on hand already, feel free to use those bad boys up rather than buy more.
You can also play with the types of chocolate. In this recipe I used 2/3 70% cocoa solids and 1/3 60% cocoa because that was what I had on hand. I would however recommend sticking to 60% or above, otherwise the brownies will become too sweet.
The Process
This recipe is super simple, it mostly consists of measuring and stirring things together, so its perfect to make with kids too. The most complicated bit is melting the chocolate and butter together if you haven't used a double boiler before, but I'll explain it all below.
Step 1: Straight into the action with the double boiler! You can buy double boiler pans which look like two saucepans stacked on top of one another, but honestly you should save your money as you can make your own double boiler using a saucepan and a heatproof bowl. The purpose of the double boiler is to use the heat and steam from heated water to melt the chocolate and butter without the chocolate ever being exposed to the water itself, which would cause the chocolate to split. You could choose to melt the butter and chocolate in the microwave, but you are at risk of burning it that way, so the double boiler method is preferred.
Take your saucepan and fill it with about one inch of water. Stack a heatproof bowl on top, and put your chocolate and butter inside. I like to cut the butter into smaller cubes to help it melt more quickly and prevent over-cooking the chocolate. Once assembled, turn the burner onto a medium high heat and let the chocolate and butter melt together, stirring occasionally. Keep a watch on the pot to make sure the water is not boiling over as it could get into the chocolate and ruin in. Adjust the temperature as needed.

Step 2: Mix together the sugar and the eggs until they are frothy.
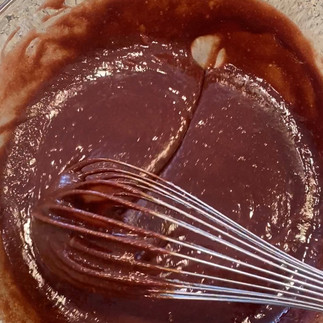
Step 3: Mix the melted chocolate mixture in with the sugar, eggs and vanilla. At this point it will feel extremely runny. Don't worry, this is normal! It will thicken up when we add the rest of the ingredients.
Step 4: Chop the nuts to your desired consistency
Step 5: Measure out the flour and salt
Step 6: Add the dry ingredients to the wet ingredients and combine with a spatula. Now your mixture will feel really thick and fudgy.
Step 7: Pour that delicious mixture into the prepared pan and bake for 30 mins at 350F.
Step 8: Resist the urge to eat the brownies straight out of the oven, because they are moist in the middle and need time to set. After about one hour you should be good to go ahead and cut and enjoy!


Comments